

Modifying a microscope for photography
Some years ago, Anne and I bought and modified an Olympus BHB microscope to extend
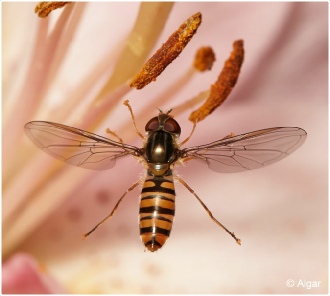
the range of our natural history photography. For many years, our interest in photographing
nature has ranged from birds to macro shots of insects and spiders with the limitation
of the life-
For our first attempts at extreme macro, we used Novoflex bellows and 3 different lenses – a reversed 50mm Nikon enlarging lens, and 4x and 10x Nikon finite microscope lenses. The Novoflex bellows allows for moving the camera and lens backward and forward as well as varying the distance between lens and camera. Due to the extremely short depth of field beyond 1:1 magnification, stacking of multiple images is highly desirable, if not essential. To enable accurate movement of the camera between shots, we fixed the bellows to the cross slide of a small lathe and used the adjustment knob to make the small steps necessary. It did not take long, however, for us to become fed up with the repetitive task of moving the camera forward and then firing the shutter multiple times for each photograph. Our salvation came in the form of a Stackshot from Cognisys, which automates the procedure. All we have to do now is set the step distance and the upper and lower focusing distances, and Stackshot does the rest. After a while, we built a vertical stand to support our extreme macro set up for photographing aquatic invertebrates.
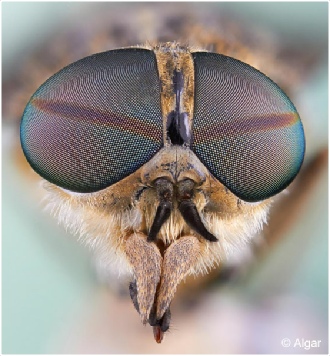
About eighteen months after starting extreme macro photography, we began to wonder whether we should add a microscope to our photographic accessories. As our interest is in producing good quality images rather than just recording subjects under a microscope, we spent some time researching what we would be able to achieve at reasonable cost. To put it another way, we regard our microscope as another camera lens rather than as a research instrument. After wading through a considerable amount of information on the Internet, much of it difficult to understand for someone unfamiliar with microscopes, we decided that we would try to use the Nikon finite objectives from our extreme macro set up on a microscope. As we already had experience of the quality of images these lenses would give, we felt reassured that we would not be wasting money on a microscope that would not live up to expectations.
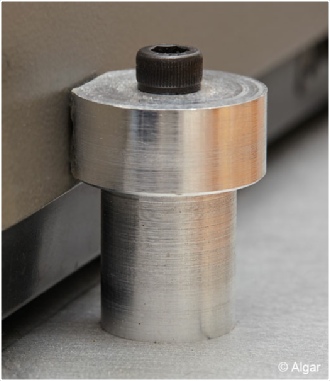
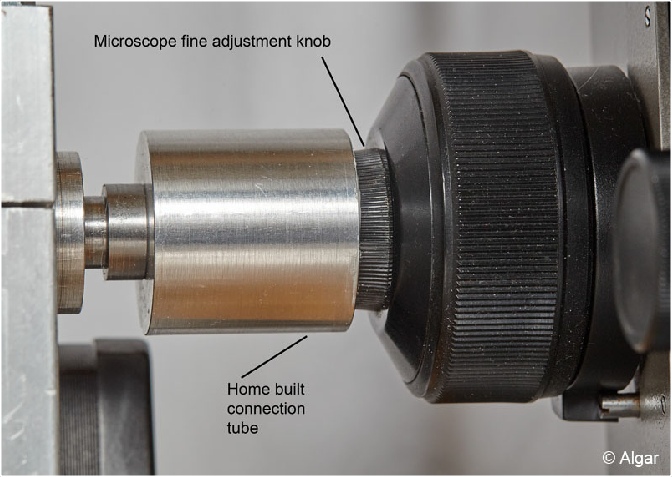
Although our Olympus BHB has a trinocular head for attaching a camera, we decided to replace the upper part of the microscope with a set of three tubes onto which a Canon camera could be attached. The short, lower tube is made of aluminium and has a dovetail cut into it which fits the microscope body. The long, upper tube is made of steel and has an adapter for a Canon body. The third tube is out of sight and simply acts as an internal connector between the other two tubes. This design has the advantage of easy insertion of a polarizing filter between the tubes. I used a piece of scrap tube similar to scaffold pole for the upper tube. This was obviously cheaper than buying the raw material but made construction more difficult because the steel was far from free cutting. To reduce reflections within the tubes, I painted the inside with matt black paint obtained from a telescope supplier. I turned a large Delrin washer to act as a bearing surface between the tubes to make rotation of the camera easier. The next step was to replace the microscope objectives with those we had been using on our extreme macro set up. Having our microscope set up this way means that the image from an objective goes straight to the camera sensor rather than passing through prisms and a photo lens first. It also means that no eyepieces are available and so we view the image on the rear screen of the camera using live view.
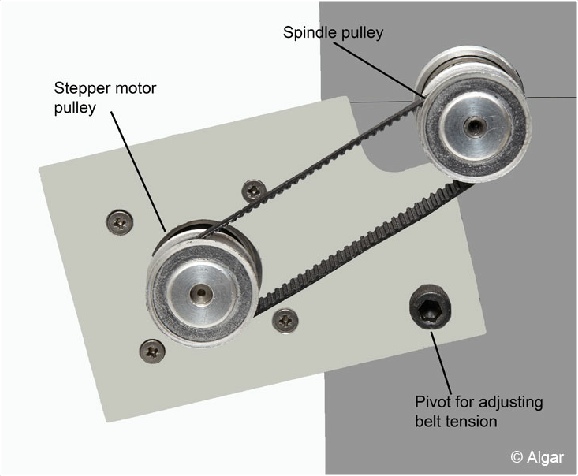
As we were intending to automate stacking on our microscope, we had to find a way of controlling the fine focusing knob with our Stackshot unit. We decided to do this with a stepper motor supplied by Conisys. To avoid drilling holes in the microscope body or making other irreversible modifications, we made up an aluminium/wood base and held the microscope to it with a home built clamping system. All fixing could then be done to the base rather than the microscope itself.
Due to the large number of focusing actions inherent in taking stacks of images,
we were concerned that the microscope fine focusing control might be subjected to
excessive wear if strong sideways or end on forces were applied to it by the stepper
motor. We therefore decided to use the motor to drive an intermediate spindle rather
than connect it directly to the fine control. This system has the added advantage
of allowing different gear ratios to be used. We used a miniature toothed belt and
matching pulleys to transmit the drive from the motor to the spindle. This system
is free from noticeable backlash. There is a tapered ‘cup’ lined with Evo-
with extension bellows

with home built tubes
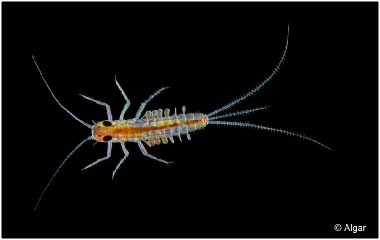
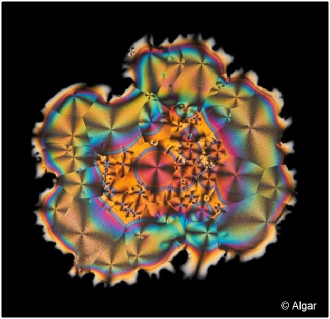
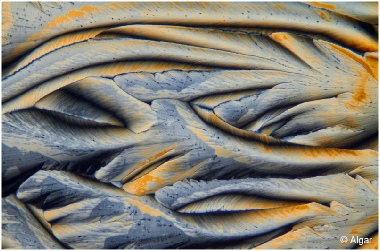
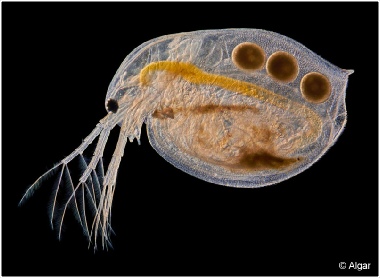
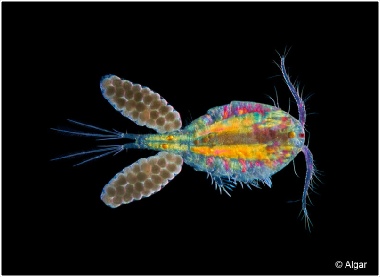
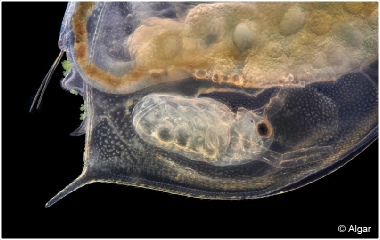
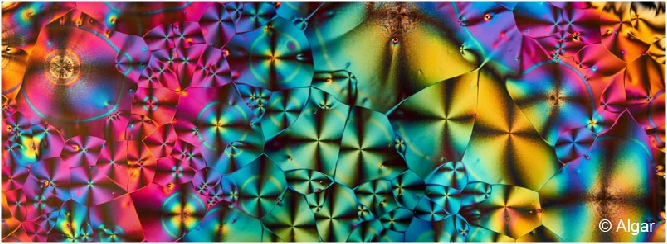
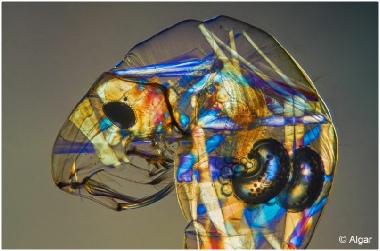
When experimenting with our new microscope, we found a number of options with which we were not familiar. When using our extreme macro set up, we illuminate invertebrates on microscope slides from above using table lamps whereas our microscope provides illumination from below. Although we generally use dark field illumination in both cases, reflected versus transmitted lighting produces some different effects. One difference is that opaque parts of a subject can come out rather dark with transmitted lighting. One of our microscope condensers has the option of sideways movement which produces oblique illumination – an effect that we had not used with our extreme macro set up. Being able to insert polarizing filters in the light path both below and above the subject can be a major advantage with some subjects. Some crystals, such as vitamin C, which show up as colourless without filtration, exhibit a spectacular range of colours when photographed through ‘crossed’ polarizing filters. Using polarizing filters plus a wave plate retarder can add colour to enhance detail when photographing some species of invertebrates.
polarizing filters
wave plate and oblique lighting
filters and wave plate